Ellie's Icicle
My secret santa prezzy was some lovely 'humbug' striped wool tops, and two very beautiful hand-blended batts of soft fibres, in black, white and grey, with glints of silk, and an envelope of silvery sparkles.


Many thanks to Ellie for helping Santa - its a very sophisticated colour scheme for an eight-year-old, and she had clearly done her research wll, as it is just what I like.
I couldn't wait to get my hands on the batts, and because the colour scheme and sparkles reminded me of the spectacular icicles we had at the beginning of December (which eventually had to be removed from the gutters by the fire brigade as they were a danger to people walking past!) I decided to name this yarn 'Ellies Icicle'.
I added the sparkles to the batts, and they spun up beautifully - I used my Ashford Kiwi wheel becauseof its lower twist ratios, and got two bobbins nearly full.

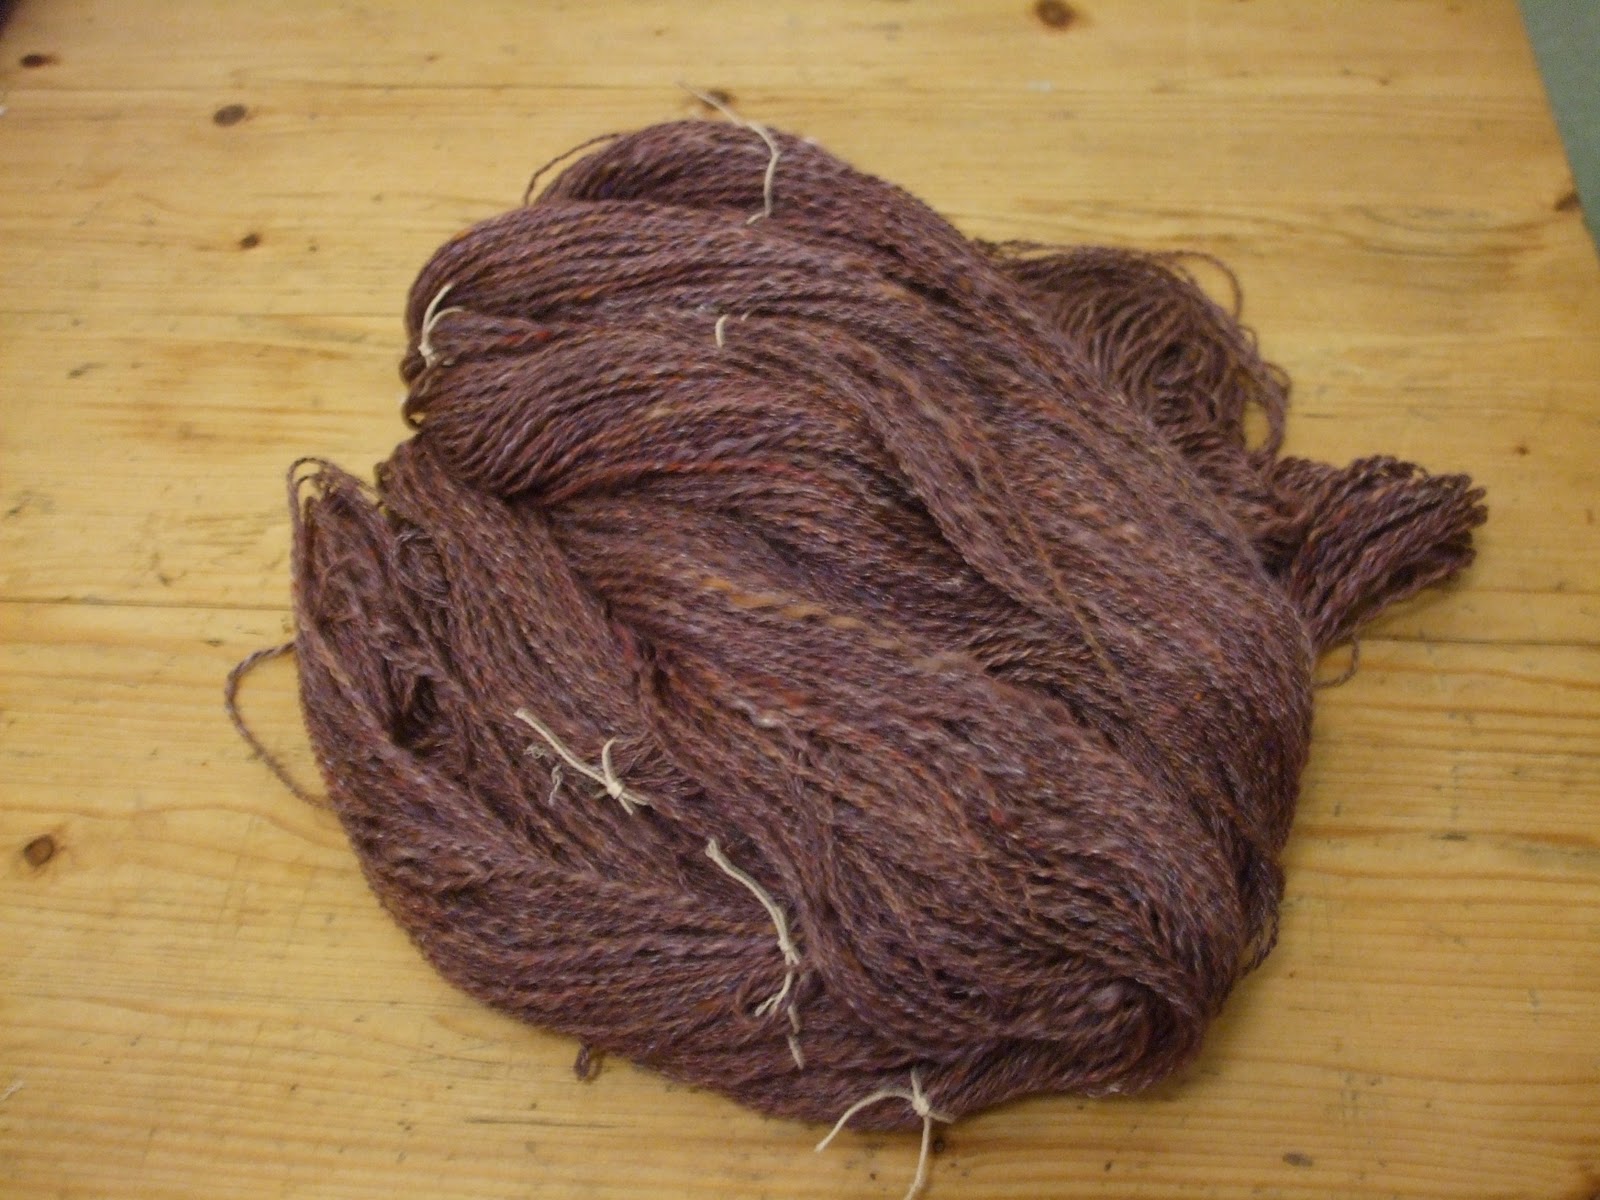
Because I wanted to keep the colours and the way they blended from one to another distinct, I decided to make a singles yarn, as plying would have mixed them too much. That meant I had to deal with the active twist - before setting, the yarn was kinking and twisting back on itself and would have been a nightmare to knit. I wound one bobbinfull tightly on to my trusty (and nearly antique!) home made skeinwinder, wet it in really hot water and then slowly steamed round the entire skein three times. Then I let the yarn dry overnight on the skeinwinder before rather gingerly taking it off. The steaming and drying under tension seemed to have done the trick and the skein barely twisted at all. I repeated the process with the other skein, and the result was the same. The total length of yarn is 190 metes, about double-knitting thickness.


I doubt very much whether the twist will remain set when the yarn is handled much, or washed, so I have planned a simple tubular cowl, knitted in the round, (on 4.5mm KnitPro circ) with rows of lace holes (k2tog, yf, K2 tog, yf....) separating narrow bands of 3 or 4 rows of stocking stitch and reverse st.st. Hopefully if the twist causes the dreaded singles slant it wont matter in a tube! I started it late last night so should find out this evening if it is going to turn out ok!
I do hope Ellie gets as much enjoyment out of the fibres that I sent her (on Santa's behalf) as I am getting from my prezzie - and I've still got the humbug top to spin...
added 09 01 11
The icicle cowl / snood is finished!

in order to emphasise the long colour changes in the yarn I decided to stick to 4 row bands of stocking stitch between rows of [K2tog, yf] 'holes' in the centre section,

I worked two bands of reverse stocking stitch separated by a row of holes and a band of stst at the top and bottom edges to prevent the edges curling, and make them a bit stiffer, so that it would sit out around the face.
The pattern is:
Tension: 18 sts and 24 rows to 10cm over the pattern repeats (R 1 - 5 below)
Cast on 100, join and knit in the round
R 1 - 4: k
R5: [K2 tog, yf] repeat to end
R6 - 9: p
R10: as R5
repeat R 1 - 10 once more, then repeat R1 - 5 until half the available yarn is used, or the work measures half the desired length ( say 10 - 12 cm for a finished length of 20 -25cm). Place a marker that will stay on this row.
Continue repeating Rows1-5 until the distance from the marker is the same as from the marker to the last p row, ending with R5.
Repeat rows 6 - 10, then rows 1 - 10
Cast off with a stretchy cast off
I had less than 12" of yarn left when I had cast off - just enough to make a button loop on the bottom edge. Sewing on a button, also on the bottom edge about 6" away from the loop allows you to fasten it at the back of the neck when wearing it as a hood, or leave it open when wearing it lose as a cowl.
Lizard ridge
Until the Ellie's Icicle yarn was ready for knitting, I went back to the Lizard ridge throw that I started last February - I completed the second strip of 5 blocks, and made a small start on the third strip. There are 5 strips to do in total. This project will get completed this year - a few blocks between each new project should get it done!! Other WIPs to finish off this year are the maths geek scarf - just a final half triangle will see that one done - and the Pi shawl. The travelling shawl will be on the go for ages as I only do that when I'm abroad......
Planets necklace
Another lovely present, this time from Elspeth, was a pack of little 'cakes' of dyed shetland/jacob roving in lovely rich tones. They were dyed by Pam Murray of Orkney for Judith Glue (Inverness)
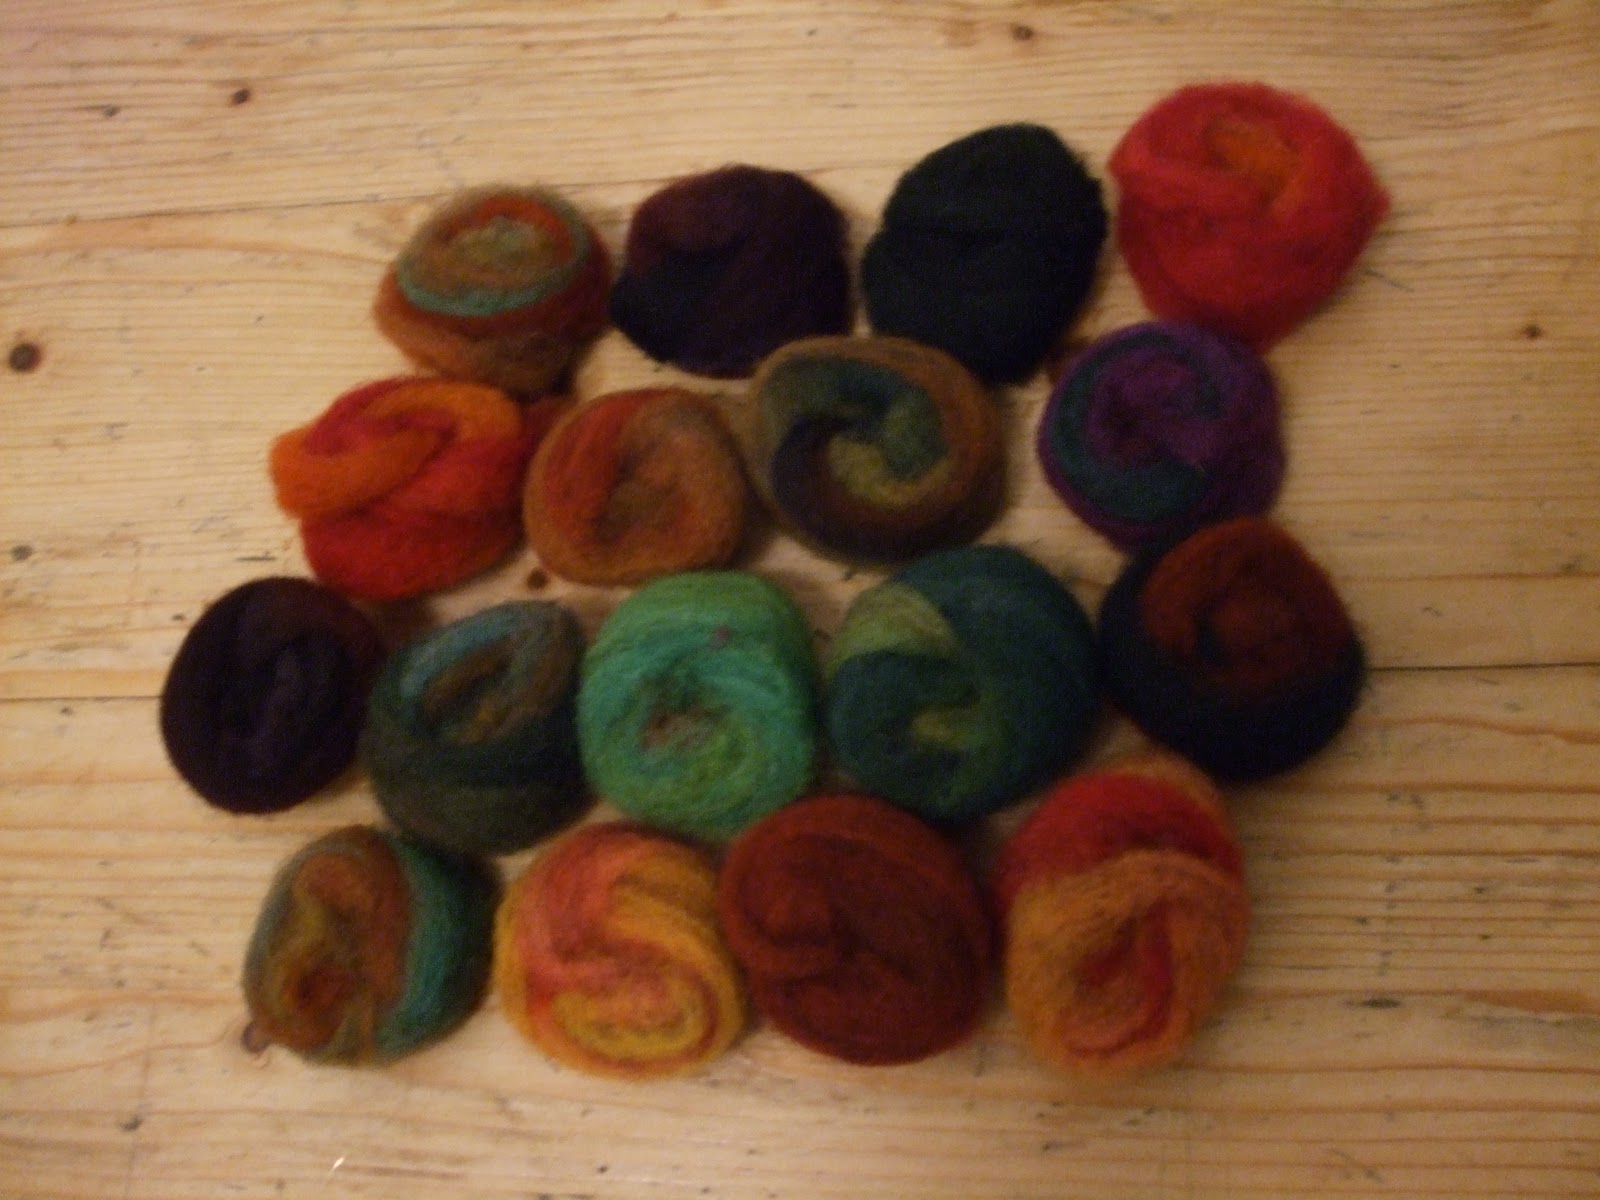
They reminded me of the hand-made glass I used several years ago to make a stained glass panel based on the planets of the solar system - hence the name 'Planets necklace'.
I loved the colours and the way they swirl round in the cakes and wanted to keep this, so i decided to make big felt beads. I tried Wet felting a couple but because they were loosely wound it didn't work well, and winding the roving tighter before felting resulted in a one-colour bead, so I needle felted the rest, which retained the marbled effect, stopping when the beads were still quite soft. I threaded the beads on to the narrow dark red velvet ribbon that Elspeth had used to tie up the parcel - it was really difficult to get the ribbon, threaded on a large needle, through, and I was glad I hadn't felted them any harder! I also wet-felted one into a flat disc for a brooch.

Heirloom quilt
On Hogmanay (New Year's Eve to some!) and Ne'er Day (you can guess that one!) I made a large quilt. This is a project that I had been planning for ages, as a way of using a collection of antique embroidered and lace-edged tray cloths, napkins and other small items.
Using a double duvet cover to enclose a thin layer of wadding, I first tacked the three layers together to hold the wadding in place. Then I arranged the cloths in a more or less symmetrical way, pinning them on (and sometimes to my bed, the only surface big enough to work on!) These early stages took several hours and were very sore on the back! I machine-stitched round the edges of a few before it was time to go and see in the new year with friends.
Next day I finished stitching round all the cloths, which at times felt like a wrestling match as I had to manhandle the 2 metre square quilt, bristling with pins! Eventually after several hours everything was attached. The quality of some of the stitching is not as good as I would have liked but I'm sure I'm the only one who will notice that! I backed the quilt with a very pretty Cath Kidston print (Paisley, in pale pink).
It will be a lighter alternative to a duvet on warm nights (which feel a long time away at the moment!). Some of the cloths belonged to, and were possibly made by my grandmother Margaret, and I am pleased to have them back in use, if not for their original purpose - I'm sure Granny would be too.

Plum Jam and an Andean Plying adventure
Last (but not least), in the 8 days after christmas, I have finished spinning the merino and silk mix that I am calling Plum jam (because of the colour). I got the fibres at Twist Fibrecraft Studio (mecca for spinners and knitters. felters, crocheters.....have a look at the Ravelry group) at the end of the summer but had only spun about half when I had to put it aside for the christmas projects.

There is a slight difference in appearance - the andean plied is slightly fuzzier - I suppose this is because the fibres in one of the plies are running in the opposite direction to the other one - in efect what you do is fold one single in half and ply the beginning with the end, so half of it is turned around and the ends of the fibres are probably raised up slightly. The difference is barely noticeable but I will try to use the andean plied yarn for a distinct part of the garment, e.g. the ribbing. If it was used with the other yarn in, say a panel of stocking stitch I think the change might be noticeable.

All this sounds as if I havent been out or seen anyone all holidays, and certainly the weather has kept me at home a bit more than usual, but actually I have had a fairly sociable time!!
One more day of holiday tomorrow, and another project in mind, before I go back to work - but I'll be trying to keep the creativity flowing well in 2011.
No comments:
Post a Comment